Your dolls will love having their very own cuddly and cute mini teddy bear to snuggle all night! These DIY Pom Pom Teddy Bears are quick and easy to make, and make a great gift – for your doll’s birthday, as a holiday gift, or for any special occasion you can think of!
Make a few extras and give them to your friends as a gift for their dolls!
Here are the detailed step-by-step instructions for making DIY Pom Pom Teddy Bears:
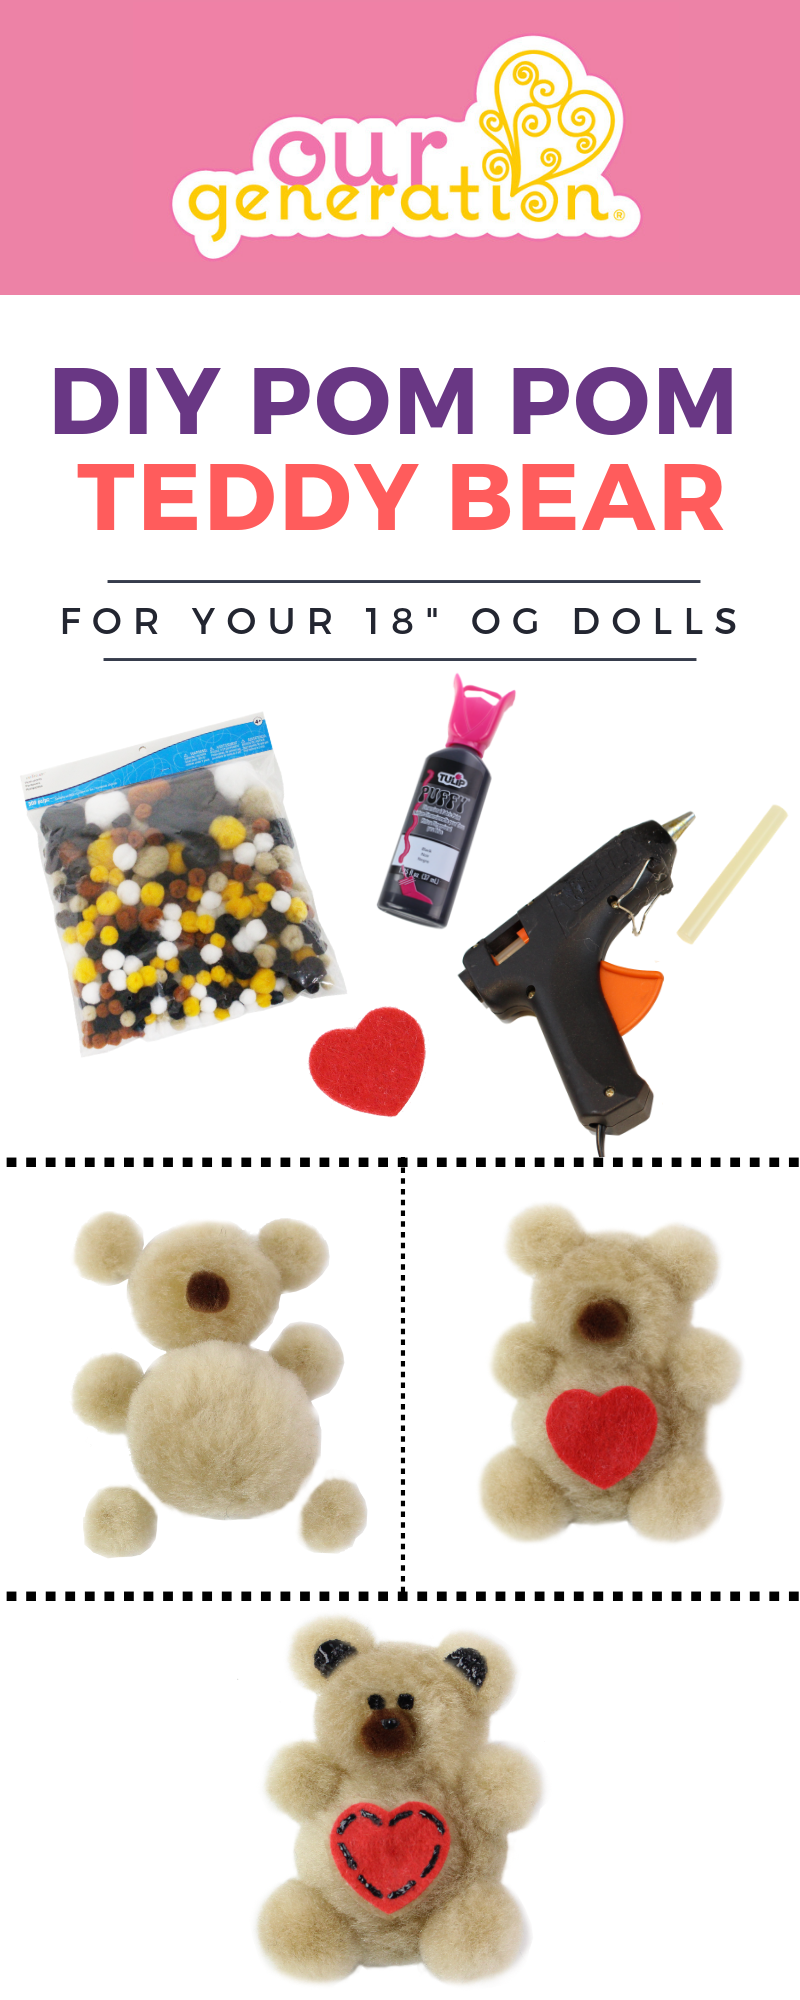
Supplies:
Various sizes of Pom Poms (you can choose whatever colors you’d like!)
Small felt heart, or heart gem
Black Puffy fabric glue
Glue gun (and glue sticks)
Instructions:
Select the pom poms you’ll use to create your teddy bear
Use the glue gun to glue the pom poms together (children will need adult supervision for this step)
Use the Puffy fabric glue to create eyes or any other designs you’d like to have on your teddy bear
Once your teddy bear has dried (overnight), it’s ready to be shared with your OG BFF! ❤️
Did you know?
The original teddy bear was named after US President Theodore “Teddy” Roosevelt. Teddy bears are still one of the most popular gifts given to children, and even to adults to ‘signify love, congratulations, or sympathy.’
The DIY Pom Pom Teddy Bears are also a perfect craft to make at a Sleepover Party! Your guests can each make a Pom Pom Teddy Bear to give to your OG dolls!
This adorable jar of sweet treats makes a great gift for your favorite dolls, your friends, your family, or anyone who loves candy!
Why not try making a few extras and giving them to someone as a surprise! After all, OG Kids love sharing their glowing hearts with the people around them!
When all the candy is gone, your dolls can keep the jar – it’s just the right size for a doll kitchen!
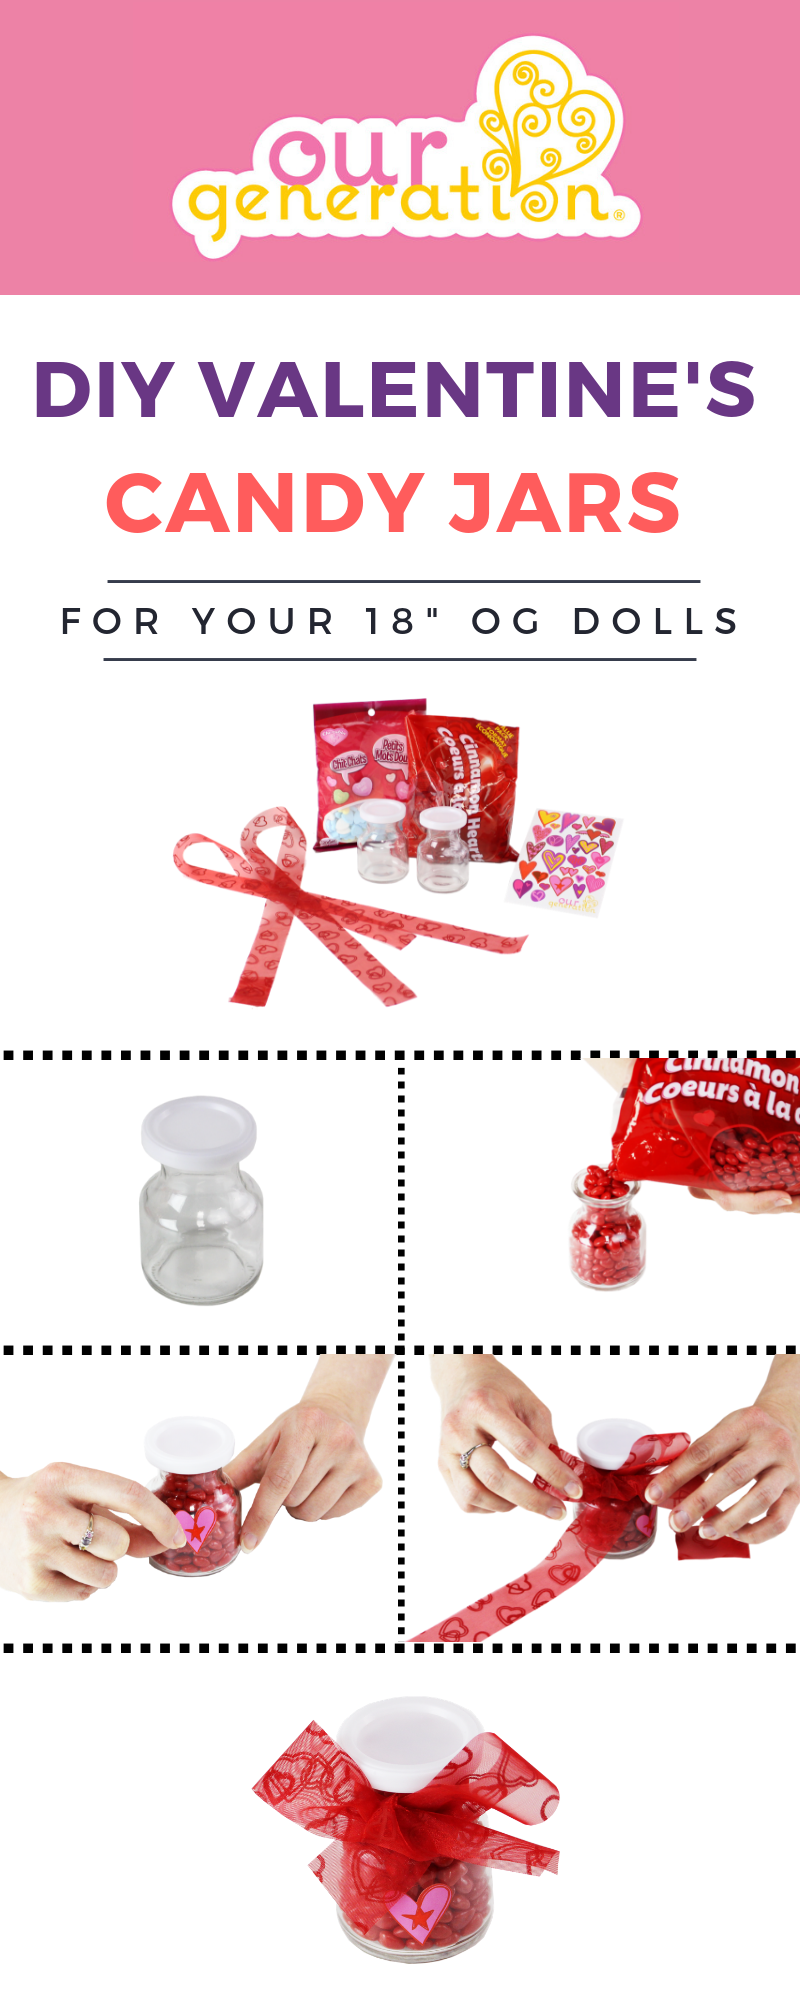
Supplies
Red ribbon
Small Valentine’s candies (e.g. cinnamon hearts)
Mini jars
Heart stickers
Instructions:
1. Cut your ribbon to roughly 18” long (or long enough to tie a bow around the tops of your jars)
2. Pour your candy into the jars
3. Decorate your jars with your stickers
4. Give them to your friends!
Did you know?
The conversation heart candies (Sweethearts Candies) have been a favorite for many children on Valentine’s day for a long time.
Did you know that these candy hearts have been around since 1901?!? That’s a looooong time for a candy to stay so popular!
The company responsible for making this popular candy actually changed the flavors in 2010, but the original flavors of this classic candy had so many fans, the change didn’t last long.
Learn how to make your very own flower friendship bracelets, just like Katelyn does in her storybook “A Blizzard on Moose Mountain”!
These easy-to-make bracelets are perfect for giving as gifts to your dolls, your best friends, and your family members.
We bet you won’t be able to make just one! 😉
Supplies:
Stretchy bead cord (0.7mm)
Crafting beads (8mm)
Instructions:
Cut a long piece of cord (around 2.5 feet long)
Tie a few knots around 2 inches from the end of the cord
Thread 6 beads onto the cord for the flower
Loop back through the first bead and then add a yellow (or different color) bead for the center of the flower
Then loop through the bead next to the center of the flower on the opposite side
Add a couple of green beads (or different colored beads) as separators
Continue the process of making flowers by repeating steps #3-#6 until you have the desired length for the bracelet (and it fits around your wrist)
Tie a knot at the end of the bracelet, and then tie the two ends together a few times to make sure it’s secure
Did you know?
The colored beads have many meanings in the Native American culture. Some of these meanings are listed below:
Yellow (truth, growth, love)
Red (birth, clarity, new beginnings)
Black (lessons, adult, sunset)
White (purity, renewal, winter)
Blue (sky, water, spirit)
Green (earth, healing, health)
How did your bracelet turn out? We’d love to see what you made! Share pictures of your beautiful friendship flower creations with us on Instagram or Facebook!